Recharging your car AC adds refrigerant back into the system to restore cold air, and it is one of the few car repairs you can do yourself with a $30 to $50 kit from any auto parts store. The process takes 15 to 30 minutes on most vehicles and requires no tools beyond the recharge kit itself. However, a recharge only works if the system is low on refrigerant from a slow leak. If the compressor has failed, the condenser is damaged, or the system has a large leak, adding refrigerant will not fix anything and can actually cause more damage.
This guide covers how to recharge your car AC correctly, what supplies you need, the step by step process, and the situations where a recharge is the wrong move.
What Does Recharging Your Car AC Actually Mean?
Recharging means adding refrigerant to the AC system to bring it back to the correct pressure level. The AC system is a sealed loop that circulates refrigerant between the compressor, condenser, expansion valve, and evaporator. Under normal conditions, the system never loses refrigerant because nothing in the loop consumes it. If the refrigerant level drops, it means there is a leak somewhere in the system that allowed it to escape.
A recharge adds enough refrigerant to replace what leaked out and restore the system’s ability to cool the cabin. The refrigerant absorbs heat from the cabin air as it passes through the evaporator, and without enough refrigerant in the loop, the system cannot absorb enough heat to produce cold air. A properly charged system produces vent temperatures between 35 and 45 degrees Fahrenheit on a warm day.
The important thing to understand before you start is that a recharge treats the symptom, not the cause. Adding refrigerant to a system with a leak refills what escaped and gives you cold air temporarily. But the leak is still there, and the refrigerant will escape again over the same timeframe it took the first time. A proper fix involves finding and sealing the leak before recharging, which is what a professional AC diagnostic provides.
What You Need Before Recharging Your Car AC?
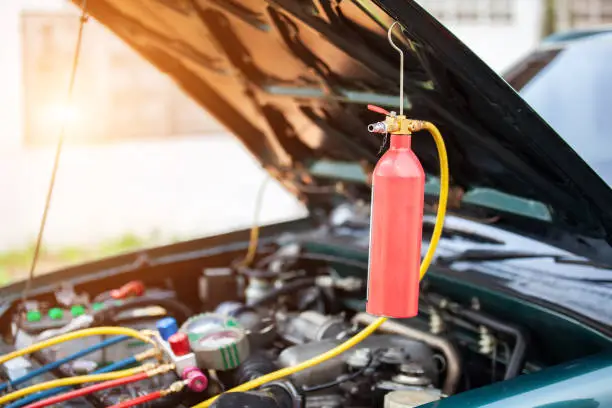
A DIY AC recharge requires a few items and one important piece of information about your vehicle. Here is everything you need before you start.
| Item | Cost | Purpose |
|---|---|---|
| AC recharge kit with gauge | $30 to $50 | Refrigerant can with pressure gauge and hose |
| Refrigerant type (R134a or R1234yf) | Check owner’s manual | Must match your system, wrong type causes damage |
| Safety glasses | $5 to $10 | Refrigerant can cause frostbite on contact with skin or eyes |
| Thermometer | $5 to $15 | Measures vent temperature to verify the recharge worked |
The single most important thing to check before buying a recharge kit is which refrigerant your vehicle uses. Vehicles built before 2018 use R134a, which is widely available in auto parts stores for $30 to $50 per can. Vehicles built after 2018 use R1234yf, which costs $60 to $120 per can and is not always available in DIY kits. Putting the wrong refrigerant into your system causes internal damage that requires a full system flush and recharge by a professional. Check the sticker under the hood or your owner’s manual to confirm the type before purchasing anything.
That Dashboard Light Will Not Fix Itself
Airbag warnings, electrical faults, and AC failures get worse the longer you wait. Send us your vehicle details and we will have a quote ready before your next drive.
How To Recharge Your Car AC Step by Step
The recharge process is straightforward if you follow each step in order. Here is how to do it correctly on any vehicle with an R134a system.
1. Find the Low Pressure Service Port
The low pressure service port is located on the larger of the two AC lines running between the compressor and the evaporator. It is usually on or near the accumulator or the suction line on the passenger side of the engine bay. The port has a plastic cap marked with an “L” on most vehicles. The high pressure port is on the smaller line and has a different size fitting that will not accept the recharge hose, which prevents you from connecting to the wrong port.
Remove the cap from the low pressure port and set it aside. Do not start the engine yet. Inspect the port for dirt or debris and wipe it clean before connecting the hose. A contaminated port can introduce particles into the system.
2. Connect the Recharge Kit and Start the Engine
Attach the recharge hose to the low pressure port by pressing it onto the fitting and twisting until it clicks or locks into place. Once connected, start the engine and turn the AC to the coldest setting with the fan on maximum. The compressor should engage within a few seconds. If the compressor does not engage, the system may be too low on refrigerant for the low pressure switch to allow it to run. Some recharge kits include instructions for adding a small amount of refrigerant with the engine off to bring the pressure above the switch threshold.
Read the gauge on the recharge kit. The gauge shows the current system pressure on the low side. Compare this reading to the acceptable range printed on the kit or on the underhood sticker. A healthy system at idle with the AC on typically reads between 25 and 45 PSI on the low side depending on the ambient temperature. Below this range confirms the system is low on refrigerant.
3. Add Refrigerant While Watching the Gauge
Hold the can upright and squeeze the trigger or open the valve to begin adding refrigerant into the system. Add refrigerant in short bursts of 5 to 10 seconds, then wait 30 seconds between bursts to let the pressure stabilize before reading the gauge again. Overfilling the system is just as harmful as underfilling because excess refrigerant creates too much pressure on the high side and can damage the compressor.
Stop adding refrigerant when the gauge reaches the correct range for the current ambient temperature. Most recharge kits include a temperature chart on the can or the gauge that shows the target low side pressure at different outdoor temperatures. At 80 degrees Fahrenheit, the target is typically 35 to 40 PSI. At 90 degrees, it moves to 40 to 50 PSI. Do not exceed the recommended range.
4. Verify the AC Is Blowing Cold
Place a thermometer in the center dashboard vent with the AC on full and the fan on high. After the system stabilizes for 3 to 5 minutes, the vent temperature should read between 35 and 50 degrees Fahrenheit depending on the ambient temperature and humidity. Vent temperatures below 50 degrees confirm the recharge is working. Temperatures above 50 degrees after a full recharge suggest the system has a problem beyond low refrigerant.
Disconnect the recharge hose from the low pressure port and replace the cap. Turn off the engine and store the leftover refrigerant can in a cool, dry place away from heat sources. Monitor the AC performance over the next few weeks. If the cold air gradually weakens, the refrigerant is leaking out and the system needs a professional leak inspection to find and seal the source.
When a DIY AC Recharge Will Not Fix the Problem?
A recharge only works when the AC system is intact and simply low on refrigerant from a slow leak. If any major component has failed, adding refrigerant is wasted money and can cause additional damage. Knowing when to stop and call a professional saves you from turning a manageable repair into an expensive one.
If the compressor does not engage at all after adding refrigerant, the compressor clutch may be burned out, the compressor may have seized internally, or the electrical circuit feeding it may have a blown fuse or bad relay. No amount of refrigerant will fix a mechanical or electrical failure in the compressor. When your car AC is not blowing cold air even after a full recharge, the problem sits deeper in the system than the refrigerant level alone. Our guide on car AC repair cost breaks down what each type of repair runs so you know what to expect before approving the work.
If the system empties within days after a recharge, the leak is too large for a DIY kit to manage. Large leaks at the condenser, compressor shaft seal, or evaporator seams lose refrigerant faster than a recharge can compensate. Continuing to recharge a system with a large leak wastes refrigerant, releases it into the atmosphere, and delays the actual repair. At that point, the decision becomes whether to fix the individual component or replace the full system, and our guide on car AC repair vs replacement explains how to tell which path makes sense for your vehicle.
A recharge kit with sealant additives can temporarily plug a very small leak, but it introduces particles that circulate through the entire system. If the sealant reaches the expansion valve or the condenser, it blocks the narrow passages and restricts refrigerant flow. A shop that later services the system may need to flush every component to remove the sealant before doing the actual repair.
How Much Does a Professional AC Recharge Cost?
A professional AC recharge at a shop includes a leak inspection, a full system evacuation, a vacuum test, and a measured recharge using calibrated equipment. This process costs $100 to $250 compared to $30 to $50 for a DIY kit. The difference in price covers the diagnostic steps that a DIY kit cannot provide, specifically the leak check and the precise measurement of how much refrigerant the system actually needs.
The vacuum test is the most important step a professional recharge adds. The technician evacuates all refrigerant and air from the system and pulls a deep vacuum for 30 to 45 minutes. If the vacuum holds steady, the system is sealed and the recharge will last. If the vacuum drops, there is a leak that must be found and fixed before any refrigerant is added. This test eliminates the guesswork of a DIY recharge where you add a can and hope it holds.
For California drivers whose recharge did not last or whose compressor is not engaging after a DIY attempt, Toki Auto Works offers car AC repair in California with full diagnostic capability including pressure testing, UV dye leak detection, and compressor verification. A proper diagnosis before the recharge confirms whether the system just needs refrigerant or whether a component has failed that no amount of refrigerant will fix.
Frequently Asked Questions
1. How often does a car AC need to be recharged?
A healthy AC system should never need recharging because it is a sealed loop. If the system needs refrigerant, there is a leak. A recharge without a leak repair is a temporary fix that will need repeating every few weeks or months depending on the leak size.
2. Can I overcharge my car AC system?
Yes, and it is one of the most common DIY mistakes. Overcharging creates excessive high side pressure that can damage the compressor, blow seals, and reduce cooling performance. Always use the pressure gauge on the recharge kit and stop when the reading reaches the correct range for the current temperature.
3. Which refrigerant does my car use?
Vehicles built before 2018 typically use R134a. Vehicles built after 2018 use R1234yf. Check the underhood sticker or your owner’s manual. Using the wrong type contaminates the system and requires a full professional flush before the correct refrigerant can be added.
4. Will a DIY recharge fix my AC if the compressor is not working?
No. If the compressor clutch is not engaging or the compressor has seized internally, adding refrigerant will not restore cooling. The compressor needs repair or replacement first, and the system needs a professional diagnostic to confirm what failed.
5. Is a DIY AC recharge bad for my car?
Not if done correctly with the right refrigerant type and proper gauge monitoring. The risk comes from overcharging, using the wrong refrigerant type, or adding sealant additives that can clog internal components.
Get a Straight Answer Before You Spend a Dollar
No guesswork, no upsell. Tell us the problem and we will run it through the same OEM software your dealership uses, then give you an honest quote. Family owned, 5.0 stars, 128 reviews.